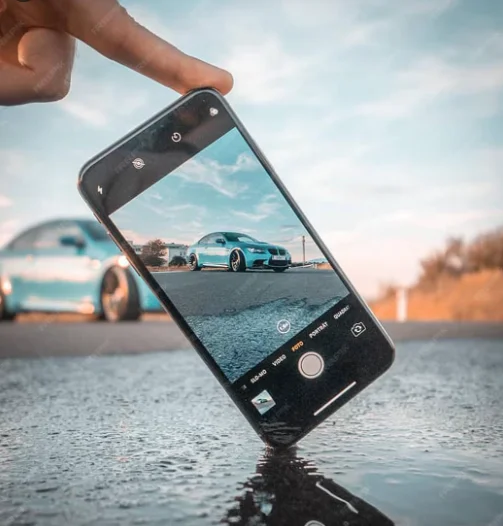
In today’s digital automotive market, car photos are often the first interaction a buyer has with a vehicle. Be it a dealer, a reseller, or an individual seller, the picture quality of the car impacts heavily on building trust and getting youngster inquiries. Today, smartphones are capable of giving you professional-standard photos if used correctly.
So, how to take car pictures with phone?
This can be achieved by an understanding of lighting, angles, preparation, camera settings, and composition. With the right knowledge, a simple smartphone camera can produce clean and clear images of a car that are as good as those from a DSLR camera and also work well in online car listings.
If you’re interested in learning the secrets behind the car pictures that appear in the search results and the ones that get overlooked, then read on. This blog will give you a complete guide that will walk you through everything.
Why Phone Cameras Are Effective for Capturing Vehicles
Contemporary smartphones are equipped with high-end imaging sensors and AI processing systems along with image stabilization facilities. This makes it possible to get perfect shots without any requirement for professional photography equipment.
Ever wondered, “Can phone cameras really replace professional car photography?”
In the majority of online listings, the answer is YES when used properly.
The other advantage that smartphone photography has to offer is speed, flexibility, and cost-effectiveness. This is particularly beneficial when dealing with several cars at once.
- Advanced Camera Sensors
Modern smartphones come equipped with high-resolution sensors that capture sharp details, accurate colors, and clean textures essential for car photography. - Built-In AI Image Processing
Phone cameras automatically enhance exposure, contrast, and clarity using AI, making car images look polished without manual adjustments. - Easy Accessibility and Convenience
Phones are always available, allowing quick photo sessions without setting up professional equipment or waiting for photographers. - Cost-Effective Solution
Using a phone eliminates the need for expensive cameras, lenses, or studio setups while still delivering professional-quality results. - HDR and Night Mode Capabilities
Smartphones handle challenging lighting conditions well, helping capture balanced images in both bright daylight and low-light environments. - Stability and Image Stabilization
Built-in optical and digital stabilization reduce blur, ensuring sharper images even when shooting handheld. - Instant Review and Retakes
Photos can be reviewed immediately, allowing quick corrections in angles, lighting, or framing during the shoot. - Seamless Editing and Sharing
Images can be edited and uploaded directly to listings or platforms, speeding up the entire car-selling workflow.
Preparing Your Car Prior to Picture Taking
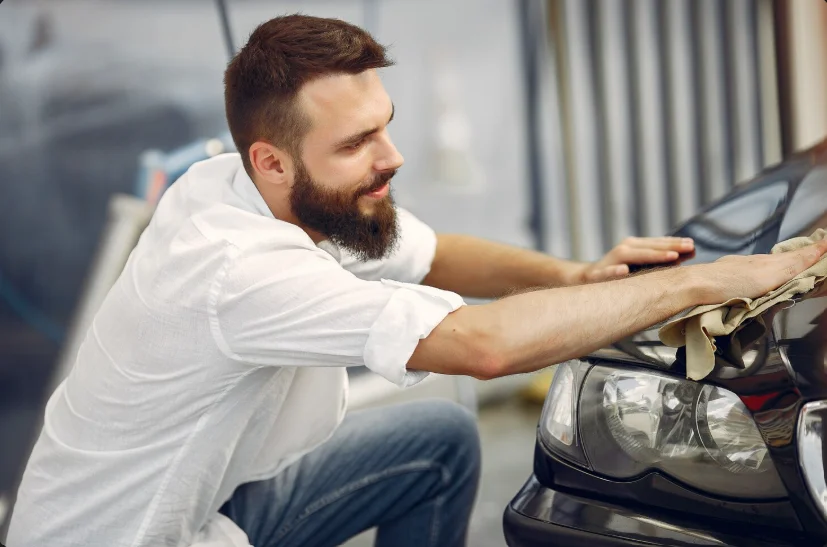
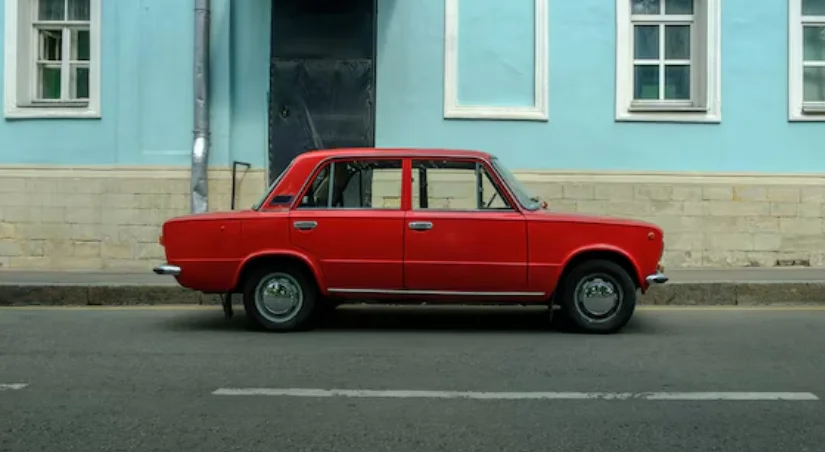
Before you touch the camera, preparation is a must. A clean car is always preferable to a dirty one in a photograph.
Have you ever wondered, “What do car dealers do before photographing vehicles?”
These include aspects of cleanliness, symmetry, and aesthetic appeal.
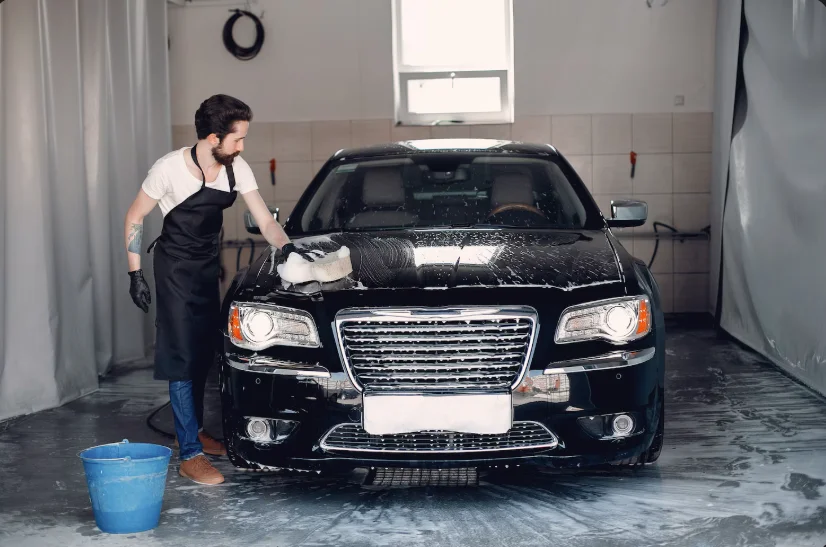
But prior to the actual photography session, it is important that the vehicle be properly prepared. This eliminates distractions and helps draw attention to the condition of the automobile.
1. Wash the Exterior Thoroughly
Clean off dust, mud, and water spots to make sure that reflections are maintained and are free from dirt. Dust makes it even more noticeable on high-resolution pictures taken from phones. A slick body increases the shine and color detail.
2. Clean the Wheels and Tires
A dirty set of wheels can mess up a picture that would have been absolutely perfect otherwise. Waxing the tires adds contrast and accentuates the position of the vehicle. Clean wheels convey professionalism and attention to detail.
3. Detail the Interior
Remove vacuum seats, reduce clutter, and clean the screens. Consumers want buyers to see ownership, not someone else’s. A clean interior builds an emotional connection.
4. Eliminate Personal Effects
Objects such as phone holders, bottles, or documents act as distractions to viewers. Minimalism allows viewers to concentrate on the automobile. Clutter-free images convey the impression of transparency.
5. Check the windows and mirrors
Fingerprints and smudges poorly reflect light. Clean glass helps to improve visibility by reducing glare. This further helps to improve interior visibility.
6. Fix small visual issues
Straighten the seat belts, the steering wheels, and the head rests. Such minute details contribute to symmetry. Correction of minute issues improves the quality of the image.
7. Check Number Plate Visibility
Make sure plates are clear and easily readable. In certain circumstances, interim covers may be employed at a later stage. Clearly visible plates enhance listing integrity.
8. Park on a Level Surface
Irregular ground surfaces affect proportions. Equal proportions can be maintained only with an even ground surface. It helps frame the vehicle properly.
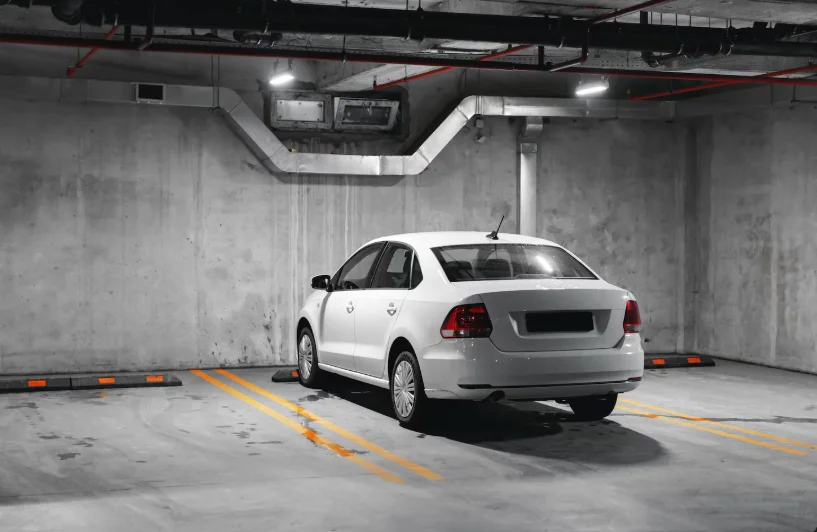
9. Selecting the Right Location
Location is a key component in making professional-looking pictures. Even a clean car may not appear attractive in a bad setting.
Have you ever asked yourself, “Where should I photograph my car to get the best possible results?”
Well, the best locations are usually neutral and distraction-free. Have a look at the following part to know more.
8 Best Locations for Car Photography
Picking the right background is crucial in order to draw the viewer’s attention to the car. Secondly, it has a subconscious effect on the customer’s perception.
1. Empty Parking Lots
They offer space, simple lines, and reduced distractions. Large areas enable several angles at once. This is particularly suitable for coverage of the entire vehicle.
2. Unicolored Walls or Structures
The neutral walls eliminate visual noise. They assure that the car remains the central point of focus. This design gives it a showroom effect.
3. Dwelling Districts with Low Traffic
Empty streets provide natural settings free from disorder. Trees and blue skies provide depth when handled well. Refrain from busy backgrounds.
4. Dealership Lots
Consistency is important in listing several vehicles. Using one spot promotes branding. Customers associate consistency with professionalism.
5. Avoid Busy Areas
People, signs, trash, and poles are distractions to the viewer. They depreciate the appearance of the listing. Cleaning the area adds to credibility.
6. Use Natural Surroundings Wisely
Greenery can be made more visually pleasing through balanced composition. Do not have objects over-shadowing or extremely contrasting colors. Ensure that your car is prominent in the composition.
7. Check Ground Cleanliness
Oil stains and debris pull attention downward. Clean ground supports a polished look. Small details make big differences.
8. Keep Consistent Locations
The background is uniform. This gives better inventory images. It is easy to compare images. This creates confidence.
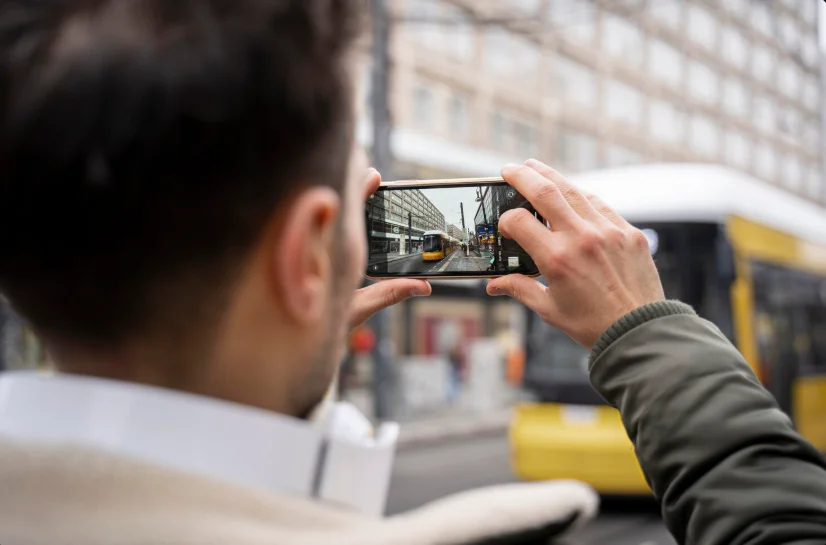
How Do I Take Car Pictures with a Phone? All You Need to Know
There are some important tips and tricks that can be followed in order to take professional-level photos of your car with your phone. Some of the key strategies are mentioned below:
1. Lighting Techniques for Phone Car Photography
Lighting is the most crucial factor in photography. Nothing can spoil an excellent composition if the lighting is not good.
Have you ever noticed that car pictures look different at different times of the day?
Lighting direction and intensity can be a complete game-changer.
-
- How to Use Light Effectively: Light helps reveal curves, color, and conditions effectively.
- Use Natural Light: The early morning and late afternoon times are preferred due to soft lighting. Soft lighting will reduce any harsh effects of shadows and glaring light. It will also accentuate body lines perfectly.
- Avoid Midday Sun: Harsh overhead lighting causes reflections and shadows. It may lose details. It causes lighting to appear uneven.
- Park the Car at a Strategic Location: Turn the car so it catches the light evenly. Prevent direct light reflection from buildings. Even lighting helps with clarity.
- Use Shade When Needed: Open shade decreases the contrast. This is beneficial on sunny days. Make sure the whole car is illuminated evenly.
- Avoid Flash Photography: The flash creates harsh highlights. It flattens details and causes glare. Light from nature is always better.
- Watch for Reflections: Glass and paint act as reflection surfaces. Shift your position to allow less distraction. Cleaner reflections add to professional impression.
- Use HDR Mode Carefully: HDR enhances both the bright and dark areas. It performs very well when lighting conditions are bright. This technique should not be overdone.
- Maintain Lighting Consistency: Take all photos in similar lighting conditions. It makes listings look consistent in appearance. Consistency is important in improving the buyer experience.
- Camera Angles and Composition: Angles determine consumer perception. Correct angles enable cars to appear confident and well-proportioned.
Existing Relevant Content:
What Lighting Setup is Best for Vehicle Photography?
2. Critical Angles to Capture Car Photos with a Phone
Make sure the listing shows the item from all angles before posting. Angles not shown can create uncertainty for the potential buyers.
- Front Three-Quarter View: This angle is the most compelling to look at. This image highlights the contours of the depth, the headlights, the grille. Consumers emotionally associate themselves with this
- Rear Three-Quarter View: Calls attention to taillights and rear aspect. Gauges the visual narrative. The rear aspect is crucial.
- Side Profile: The car’s size and condition are shown here. The buyer will examine the dents and alignment of the car here. The camera must be kept
- Front View: Symmetry in picture. Condition of grille. Straight frame to avoid distortion. This builds trust.
- Rear View: Displays the boot capacity and condition. Center the car correctly. Do not tilt.
- Interior Wide Shot: Trailer dashboard and seats combined. This creates a good overview in the cabin. Customers demand transparency.
- Dashboard and Controls: Display show screens, control buttons, and miles. This will boost confidence. It prevents follow-up questions.
- Engine Bay: Cleaner engine photos indicate work done. Avoid clutter. Natural lighting will be ideal.
- Boot Space: Capacity and cleanliness. Buyers assess functionality. Good presentations sell.
3. Camera Settings to Use on Your Phone’s Camera
Knowledge of basic camera settings can make a world of difference in the quality of the final image. Most smartphones offer manual control options.
Have you ever asked yourself, “What phone camera settings should I use when taking pictures of cars?”
Well, look no further. Remember, small adjustments make big differences too. Use these settings to improve clarity and consistency.
- Enable Grid Lines: They help align the car properly. Straight horizons improve professionalism. Composition becomes easier.
- Use Highest Resolution: Always shoot at maximum quality. This preserves detail. It also allows cropping later.
- Disable Beauty Filters: Filters distort colors. Accuracy matters in car listings. Keep images natural.
- Lock Focus and Exposure: Prevent lighting shifts between shots. Consistency improves listing quality. Locking avoids blur.
- Use Wide Lens Carefully: Wide angles add depth but can distort edges. Step back slightly. Keep proportions realistic.
- Avoid Digital Zoom: Zooming reduces quality. Move physically closer instead. This maintains sharpness.
- Clean the Lens: Smudges reduce clarity. A quick wipe improves sharpness instantly. Always check before shooting.
- Use Burst Mode When Needed: Helps capture sharp images. Especially useful in low light. Choose the best frame later.
4. Frame and Composition Skills for Best Auto Photos
Good framing ensures that the vehicle looks balanced, proportionate, and pleasing in all shots. Even when shot from a favorable angle, if not composed well, it is possible that the vehicle might look odd or deceptive in appearance. Composition directs one’s focus on the vehicle while emphasizing its best points.
Do you ever wonder, “Why are some car images superior while others are just random?”
Very often, it is with regard to how the subject matter occurs within that picture.
- Center the Car Properly: Use the frame to keep the vehicle in line. This will prevent an imbalance in images. Center framing helps create trHow to Take Car Pictures with a Phone The Ultimate Guideust and clarity.
- Apply a Rule of Thirds Position: Position the car slightly off-center by utilizing the grid lines. This gives depth to your image. This also keeps your images from looking flat.
- Leave Adequate Headroom: Do not chop off the roof or tires of the vehicle. This allows the car to “breathe.” This prevents an overly tight shot, looking
- Keeps the Horizon Straight: A sloping horizon creates deception. Lines straighten an image. Consumers intuitively prefer straight pictures.
- Fill the Frame Without Cropping: Make sure that the car is the prominent part in this image. It is necessary to avoid a lot of empty space. This will retain focus on that
- Prevent Extreme Close Cropping: Don’t crop mirrors, bumpers, or wheels. Incomplete items will arouse suspicion. Completeness inspires trust.
- Balanced Background: Make sure there are no objects that dwarf the car. Clean backgrounds aid in focus. Keep it simple because simplicity sells well.
- Consistency between shots: The similarity in framing for all pictures creates a professional listing.
5. Keeping consistency in Capturing Car Photos with a Phone
Consistency is very important in making listings appear professional and credible. A buyer may view several listings in fast succession, so inconsistency in listings may destroy confidence in them. Consistency in listings may make them appear more organized.
Have you noticed how organized listing patterns seem more legitimate than disorganized ones? This is primarily due to consistency in visuals.
- Use the Same Lighting Conditions: Take all photos during the same time of day. Contrasting lighting confused me. Consistent lighting was really professional.
- Maintain Similar Camera Height: The phone should be at the same position. This creates a sense of harmony. Random placement creates a sense of stagnancy.
- One Background Location: Changing venues feels choppy. Having one location feels consistent. Consumers think more clearly.
- Keep Orientation the Same: Use either portrait or landscape formats throughout. Mixing them looks unrefined. Sites also like uniform media.
- Match Editing Style: Match Do not over-edit some photos and leave others untouched. Inconsistent tones seem suspicious. Consistency yields authenticity.
- Follow a Fixed Angle Sequence: Upload pictures in order. Exterior -> Interior -> Details. This makes navigation easier.
- Avoid Mixing Filters and Modes: Inconsistency in applying HDR to some images and not others. Settings should remain consistent.
- Maintain Standardized Distance from the Car: Equal spacing helps maintain proportion. Consumers like predictability.
- Ensure Similar Sharpness Levels: The use of blurred pictures when the rest of the photos are clear stands out as a negative practice. Retake the weaker photos immediately.
How to Take Car Photos with Phone at Night
Nighttime photography is another form of photography that demands special consideration. Nonetheless, it can produce very pleasing effects.
Have you ever wondered “Is night car photography possible with a phone?” Yes, provided that I know the proper technique.
When filming during the night, stability and adequate lighting are necessary before filming. Before shooting at night, ensure stability and proper lighting sources. Check out the following points for some key points to take car photos with phone at night:
- Use Well-Lit Areas
Streetlights or parking lot lights help. Avoid dark, uneven lighting. Consistency is key. - Use Night Mode
Most phones have built-in night modes. This improves exposure. Keep the phone steady. - Use a Tripod or Stable Surface
Stability prevents blur. Even small shakes affect quality. Rest the phone when possible. - Avoid Direct Light Sources
Lights facing the lens cause flares. Position the car sideways to lights. Control reflections. - Shoot Multiple Angles Carefully
Night exaggerates shadows. Check each image carefully. Retake if needed. - Reduce Background Distractions
Dark backgrounds help cars stand out. Avoid busy neon signs. Keep focus on the vehicle. - Adjust Exposure Manually
Lower exposure slightly. This prevents blown highlights. Details remain visible. - Check Images Immediately
Zoom in to check clarity. Retake blurry shots instantly. Night errors are common.
10 Common Mistakes to Avoid while Capturing Car Photos with Phones
Even the slightest errors may result in a decreased performance in the listings. Ever wondered, “Why do some car listings get ignored?”
Sometimes, the cause might be poor photography. Low-light photography, cluttered backgrounds, tilted horizons, too much filter work, uneven angles, a lack of interior photography, or blurry images. All these problems can now be corrected by making these changes:
- Shooting in harsh midday sunlight that creates strong glare and deep shadows
- Taking photos in cluttered or distracting backgrounds that pull focus away from the car
- Using digital zoom instead of physically moving closer, which reduces image quality
- Holding the phone at uneven angles that distort the car’s proportions
- Forgetting to clean the car properly before photographing it
- Relying heavily on filters that alter the car’s true color and condition
- Ignoring reflections of people, buildings, or the photographer on the car’s body
- Taking photos in low light without proper stabilization or lighting support
- Missing important angles such as interior details, wheels, or rear views
- Uploading blurry, low-resolution, or inconsistently framed images
Existing Relevant Content:
10 Photo Mistakes That Kill Your Car Sales (With Proven Solutions)
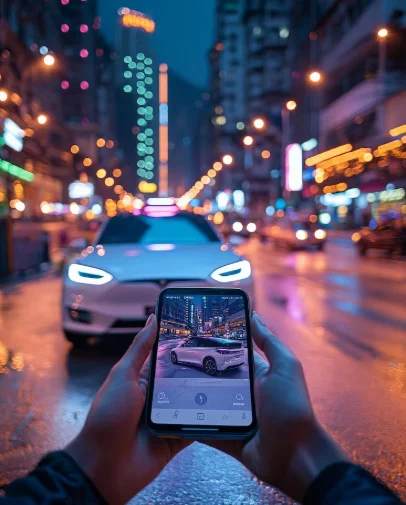
Use the C-AR App to Improve the Car Pictures
Hopefully, by now, you have an in-depth idea of how to take car pictures with a phone.
However, even after taking good car photos, sometimes we need to edit them. Especially if you are a car dealer or simply selling your car. And to make our car pictures better, we use various tools.
Now, speaking of tools, one all-in-one tool that can transform your pictures is the C-AR App.
This app improves car pictures through-
- Rim polishing,
- Creating Realistic car reflections,
- Selecting from multiple car backgrounds(showroom quality),
- blurring license plates,
- Car Polishing
- Adding logos and many other features.
So, what are you waiting for? Get the C-AR App Now!
Frequently Asked Questions
How many photos would you recommend uploading per listing?
Ideally, 20-30 photos that encompass every side.
Are mobile camera shots effective in dealership advertising?
Yes, when done correctly and professionally.
Is editing required after the shoot?
Not always. However, if you think the photos can be done better with editing, go for it.
Conclusion
Knowing how to take car photos using phone camera skills is imperative in the online auto market today. Pictures serve as the main factor used by buyers to determine the condition and authenticity of the vehicle before they make contact.
However, with proper preparation, lighting, angle direction, and enhancement tools, high-quality listings can be achieved by anyone. Professional use of all these will be beneficial to sellers as it will aid in efficiently converting views to inquiries.