When it comes to vehicle photography, lighting means everything. Whether one is a professional photographer or a car dealership owner trying to make shots of cars for their online listings, it comes down to your setup. The right lighting brings out the shape, color, and shine that defines the personality of a car.
So, what kind of lighting setup is the best for vehicle photography?
The answer lies in the combination of techniques, tools, and environments that work together, enhancing every curve and detail of the car. From soft natural light to well-controlled artificial setups, photographers use a balance of brightness, diffusion, and reflection. It helps them to come up with breathtaking shots you see in ads and online showrooms.
Ever wondered how professionals manage to achieve that perfect finish? Keep reading as we reveal the best lighting setups, necessary equipment, and professional techniques that will take your vehicle photography to the next level.
Why Lighting Matters in Vehicle Photography : 6 Key Reasons
Did you ever think why some car photos catch your eye immediately, while others do not? It is because of the lighting. Lighting determines how the surface, color, and reflections will look in the final picture of the vehicle.
Proper lighting accentuates the shape and paint texture of the car while minimizing reflections. It helps you control shadows and highlights to let depth and realism pop in your photos. Without it, even the high-end car may seem lifeless and poorly maintained.
The lighting also determines how a viewer is going to feel about looking at the car: a bright, crisp photo speaks of cleanliness and modernity, while the darker tone builds mystery and power. This is why professional car photographers treat lighting as one of the most critical aspects of each shoot.
Here’s why lighting matters more than you think:
- Defines the Car’s Shape and Details: Lighting is used to emphasize each curve, edge, and contour of the car’s surface. The right angle and intensity can make even the subtlety of design lines pop out beautifully and help the viewer appreciate the craftsmanship.
- Improves Paint and Color Accuracy: Contemporary cars have complicated paint layers, metallic flakes, and reflective coatings. Proper lighting guarantees capturing the true shade of color with no distortion, which could otherwise give the car a faded or off-shade look.
- Controls Reflections and Glare: Cars are very reflective, and without specific control of lighting, distracting glare can easily be created. The soft and diffused light reduces these reflections, allowing the surface to appear sleek and smooth rather than patchy.
- Creates a professional and polished look: Proper lighting can give your photos the kind of clean, high-end appeal that builds trust with buyers and elevates your brand’s presentation online.
- Sets the Mood and Emotion: Lighting can affect perception, for instance, bright settings make cars look approachable and modern, while darker lighting makes the shot dramatic and sophisticated, hence perfect for sports or luxurious models.
- Improves Online Engagement: Eye-catching lighting makes your photos stand out in crowded feeds and listings. Clear, well-lit images attract more clicks and convey credibility to potential buyers.
Key Elements That Define the Best Lighting Setup
Before going into the specific setups to understand which lighting setup is the best for vehicle photography, one needs to understand the key elements of car lighting. Each professional considers these factors before beginning a shoot.
These elements will not only define how your car looks but also how easy it will be to edit and enhance it further. Core lighting components you want to pay attention to are:
1. Type of Light Source
The type of light you choose dictates the tone of your entire shoot. Natural sunlight and artificial studio lighting are the two most common types of light sources.
First, natural light provides soft shadows and gives realistic reflections to get perfect shots outdoors. Artificial lighting, however, such as LED panels or strobes, gives you total control over what you want to highlight without being at the mercy of the weather.
2. Light Direction
All aspects, from the shine on the hood to the shadow of the tires on your car, are determined by which direction the light strikes from.
Front lighting reduces the shadows and provides an image that is flat. Side lighting creates depth and shape. Backlighting, otherwise referred to as rim lighting, makes all the difference, particularly in night and luxury car shoots. Play with angles to see what works best for your vehicle.
3. Light Intensity
Light intensity will define the brightness and contrast of your shot. Too much light can blow out the highlights, while too little can result in grainy photos.
Professional photographers use dimmers, reflectors, or softboxes to balance the light and maintain natural contrast across the surface of the car. Adjusting the intensity helps you achieve a clean, polished image.
4. Color Temperature
Color temperature defines the “mood” of your photo: cooler tones create a somewhat futuristic feeling, while warmer tones create a cozy and inviting atmosphere.
Always use a white balance setting that reflects the colors of an image accurately. Neutral daylight temperatures range from 5000K–5500K if you want to show the actual paint color of your car.
5. Managing Reflection
This is also the case with cars, since these are reflective objects; hence lighting up the car can easily create unwanted glares or hot spots.
Polarizing filters and diffused lighting will minimize this. The soft light sources avoid harsh reflections on the surface, especially when the finish is glossy or metallic. This keeps the car’s surface smooth and professional.
10 Best Lighting Setups for Vehicle Photography
Now that the basics have been explained, let’s go into detail with what is considered the best lighting setup for vehicle photography: the combinations that pros swear by.
Each setup serves a different purpose with respect to car type, environment, and the look the person wants to achieve. Ever wondered why every car ad looks perfect regardless of the conditions? Let’s reveal their secrets.
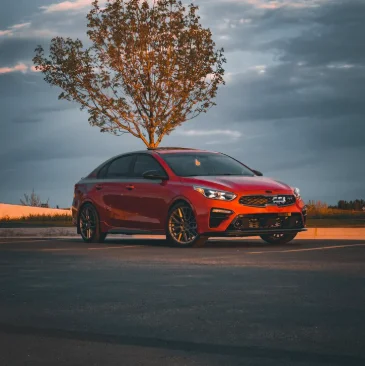
1. Natural Lighting Setup
Outdoor shoots with daylight are much better to capture cars in their most natural setting.
Shoot in the golden hour: early morning or late afternoon. The sunlight is soft and warm, so it will be more flattering. Try to avoid noon, as it gives very strong shadows and reflections. Use a Circular Polarizer to reduce glare from windshields and paint surfaces.
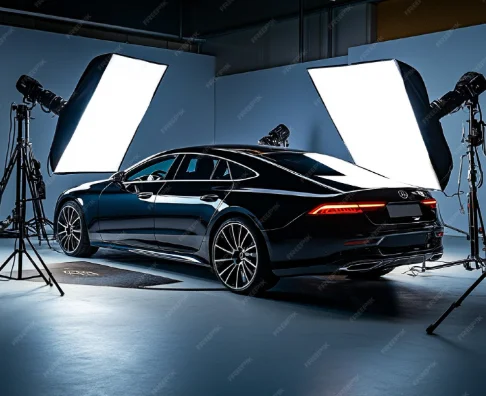
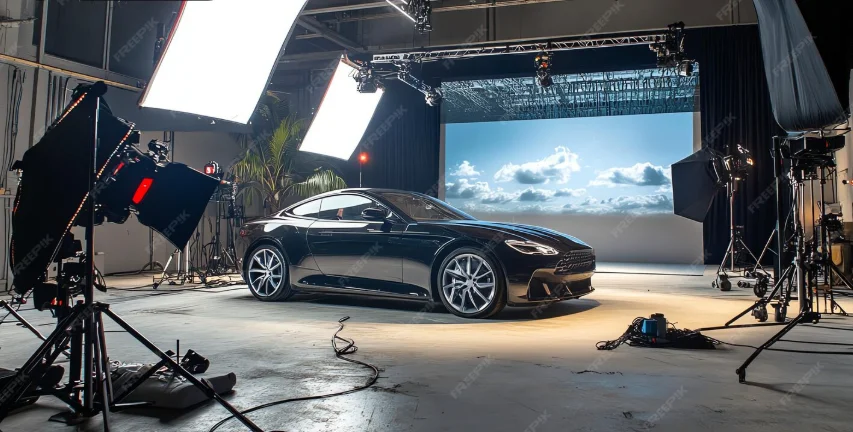
2. Studio Lighting Setup
For complete control, nothing can replace a studio setup. This environment lets you manipulate every light source in order to highlight the car’s features precisely.
Big softboxes, overhead LED panels, and side reflectors should be utilized. Keep the light even from all sides so that the contours and details of the vehicle are equally emphasized without overexposure.
3. Mixed Lighting Setup
You get the best of both worlds with a combination of natural and artificial lighting.
Use daylight as the main light, for example, and use an LED panel to fill in the shadows or emphasize the highlights. This helps to balance the tone and depth to give the car a realistic yet polished feel.
4. Rim or Edge Lighting
Ever noticed that glowing outline in high-end car ads? That’s rim lighting.
From behind or beside the car, take a powerful light source and let its subtle, blurring edges create a nuanced glow around the car. It helps define the silhouette, adding an instant premium and dramatic look to your photos.
5. Low-Key Lighting Setup
Low-key lighting uses the minimum amount of light that will produce deep contrasts between areas of shadow and light.
This setup would suit sports or luxury cars when accentuating the power and mystery of the car. One key light with controlled reflection makes the car look bold and cinematic.
6. Overhead Lighting Setup
This will help even out the illumination across the top and hood of a car, especially when working in a studio.
This kind of lighting minimizes the shadows from other equipment and gives the vehicle a clean, symmetrical look that’s just ideal for product catalogs or dealership websites.
7. Side Lighting Setup
Side lighting is great for showing the curvature and shape of the car.
Place your lights 45-degree from the subject to accentuate reflections along the doors and fenders. A method like this conveys depth and volume, thus making the photo look more dynamic and interesting.
8. Reflective Floor Setup
Ever wondered how photographers make it look like a car is floating on a shiny surface? That’s the reflective floor technique.
Beautiful reflections are achieved by placing the car on a glossy or wet surface with soft lighting. It is an easy trick, which will work for any vehicle photo you take to add depth and luxury.
9. Backlit or Silhouette Setup
Backlighting should be used when you want to highlight shape and not the details of a car.
Place the light behind the car to create an outlined glow, which is perfect for teaser shots or nighttime promotions. It adds mystery and style without showing every detail.
10. Diffused Cloudy Setup
Cloudy days are a photographer’s secret weapon.
The clouds naturally diffuse the sunlight, softening the shadows and illuminating your car with balanced soft light. This is perfect in capturing cars outdoors without requiring any extra modifiers of light.
Existing Relevant Content:
How to improve image quality for selling used vehicles?
Tips for Perfect Vehicle Lighting Setup
Knowing the theory is one thing; doing it well is an altogether different story. Here are professional tips to ensure that your lighting setup gives perfect results every time.
1. Utilize Reflectors Effectively
Reflectors bounce light into shadowed areas, allowing for an even amount of exposure across the car. For brightness, use silver reflectors; for softer reflections, use white.
2. Controlling Reflections
Take note of what reflects onto the surface of the car: even small, unwanted reflections can be distracting to your subject. Large white boards and diffusers soften reflections for a cleaner look.
3. Accentuate Wheels and Grills
These are highly reflective, detailed areas and therefore should be subjected to even lighting to bring out the craftsmanship without overexposure.
4. Balancing Ambient and Artificial Light
If you happen to be shooting outside, and have additional lights, be sure that it is similar temperature and intensity of light to the ambient light, or it will look quite unnatural.
5. Shoot in RAW Format
Always shoot in RAW to retain as much information as possible in the picture. You can change lighting, color temperature, and shadows without loss of quality.
Use the C-AR App to Enhance Pictures of Cars
Even in an ideal light setting, post-processing can do more to help your vehicle shots. That’s where the C-AR App comes in handy.
The C-AR App enables photographers, dealers, and car sellers to easily enhance their vehicle images by using AI-powered background adjustments, lighting corrections, and reflection removal, all with just a few taps.
Be it shooting in a studio or outdoors, this app helps in refining colors, contrast, while maintaining the car’s realistic appeal. It is helpful for any dealership aiming to make listings look professional and consistent online.
If you really want to produce quality images of cars, use the C-AR App to perfect each shot. You’ll save time and your vehicles will look their best.
Frequently Asked Questions
What kind of lighting is ideal for night-time car photography?
Combine LED panels with long-exposure shots. This balances the brightness while maintaining car details without overexposing the highlights.
Should I use flash for vehicle photography?
Not directly, as flash may create harsh reflection. Use diffused continuous sources or softboxes instead for smooth results.
How do I avoid glare on car windows and paint?
Every camera lens should be fitted with a circular polarizing filter. It is useful for eliminating reflections and enhancing the true color of the car.
What background works best with specific lighting setups?
Neutral or dark backgrounds work well with bright lighting, while brighter settings contrast nicely against natural scenery or minimalist studio spaces.
Is editing necessary even when the perfect lighting setup is arranged?
Yes, post-processing fine-tunes lighting balance, removes imperfections, and ensures the final output is professional.
Conclusion
Lighting is not a technical detail; it’s the secret behind each and every fascinating car photo. Understanding angles, intensity, and reflections can completely transform how your vehicle looks in pictures. Whether outdoors or in a studio, always experiment with setup in pursuit of what truly enhances the subject.
Ultimately, it all depends on your goals and the environment for the best lighting setup for vehicle photography. By combining smart techniques, careful planning, and helpful tools like the C-AR App, it is possible to achieve outstanding results that bring out the beauty and precision of every vehicle.