Great car photography is more than just point and click. The difference between great and good photographs is planning, lighting, angle, and presentation. Every detail, from cleanliness to background, has a part in making the end product look as good as possible to prospective buyers or enthusiasts.
So, how to take good car photos?
It is simpler than most individuals believe. Here’s what you need to follow to take good car photos: prepare the car, choose good light and place, configure the camera properly, be aware of the angle and composition, then correct the image during post-processing.
If you’d like to know all the tips and tricks to capture first-class car photos, keep reading. You’ll get a clear overview by the end of the article. Let’s go!
10 Key Tips & Best Practices for Car Photography

Here are some of the most important factors to take good car photos for uploading online. Some initial observations first before getting into the detailed descriptions. When taking pictures of autos, aim for clarity, beauty, and storytelling.
Each picture should highlight the shape, details, and health of the auto. And, the viewer should be drawn in, not distracted by distraction, clutter, reflections, or darkness.
Here are 10 essential points you should pay attention to:
1. Careful Car Preparation
Wash, wax, wash tires and windows, and vacuum interior. Dust or sticker off. Polishing rims or washing headlights make a huge difference when viewed up close.
A prepped-up vehicle gives off an air of professionalism and respect for the viewer’s time. If you’re selling, clean cars also translate to improved maintenance and carry credibility and trust.
Keep in mind that dust on a dashboard or fingerprints on glass will be horribly apparent as soon as the camera picks up on it. 20–30 minutes of prep prior to shooting is worth it as opposed to hours of editing afterwards.
2. Select the Correct Time of Day / Lighting
Early morning or late afternoon (“golden hour”) offers soft light, reduces hard shadows. Overcast days could also be suitable for even illumination. Avoid midday sun that causes glare and hard contrasts.
Lighting will completely change the mood of your car photo. A car photo shot at midday in direct sunlight could be two-dimensional or washed out, while the same car shot at golden hour can be cinematic.
Experiment with angles during this time, side lighting is wonderful for curves, and front lighting gives a clean, sharp finish.
3. Select a Suitable Location and Background
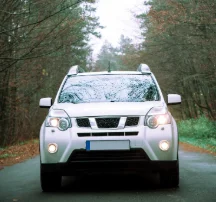
The background must not be distracting, but enhance the car. Cityscapes, factory lots, scenery in nature all function according to the car model. Avoid messy backgrounds, litter, power lines.
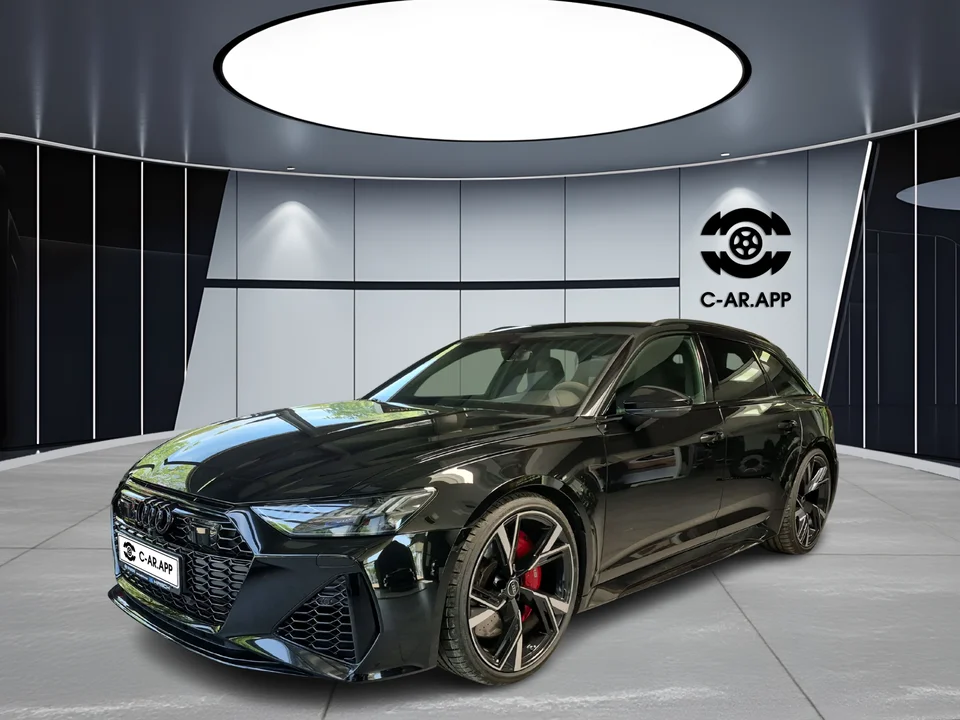
Consider the background as your painting surface. A sports car by the backdrop of a contemporary city appears swift and energetic, while an SUV in the forest conveys adventure. But any car within some showroom, real or edited, can attract more audience, their trust and increase visibility.
Select settings that reinforce the narrative of the car. Even vacant parking lots can be done if simplified and rendered clean.
4. Angles & Composition
Shoot from various angles: front, profile, three-quarter, back. Eye level or lower for dramatic pose. Include detail shots, like showing the wheels, badge, or the interior. Photograph according to composition rule (rule of thirds) to balance the frame.
Don’t stand and snap, walk around the car. Kneel for low shots, climb up to get overheads, or try diagonal angles for better photos. Cars are all about lines, shapes, and reflections, so experiment with angles to capture curves or unique design features.
5. Use Good Gear & Settings
If possible, utilize a DSLR or mirrorless camera. Use lenses ranging from ~35-200mm to prevent distortion. Utilize low ISO for transparency, high shutter speed for action, tripod for stability in dim light. Photograph in RAW if possible.
That said, even smartphones capture excellent photos with the right settings. Just keep the lens clean, engage HDR mode when necessary, and establish focus on the car. Apps allow manual ISO setting, shutter speed, and white balance; experiment with them for the best effect.
6. Mind Reflections & Glare
Car bodies and windows pick up their surroundings. Use circular polarizing filters, shoot from angles that minimize unwanted reflections. Be aware of the sky and surrounding objects being reflected.
Always check what’s reflecting off reflective surfaces. For example, you may not notice a distracting pole, tree, or even yourself until you look at the image. Moving to the left or right several steps often corrects the problem without retouching. Overcast sky also reduces excessive glare.
7. Shoot Details

Do not just photograph the whole car. Take interior, dashboard, upholstery, stitching, badges, rims. These detailed photos help in proving condition and quality. They add depth to a listing or portfolio.
Buyers and enthusiasts love detail shots. Sellers use these pictures to prove authenticity, while enthusiasts talk of craftsmanship. Use macro or portrait mode with sharp focus and blurred backgrounds, which make tiny details look better.
8. Motion & Creative Shots
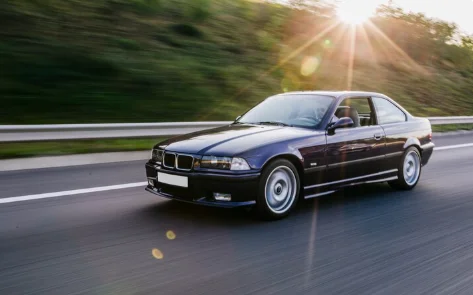
Wherever feasible, add moving cars shots, light trails, or driving scenes to bring dynamic interest. But safety comes first, proper locations. Creative framing like through windows, or motion blur also look very interesting.
Motion shots make your portfolio alive instantly. Practice panning: keep the car in motion with your camera but with a slower shutter, like, 1/60s. This keeps the car sharp but blurs the background as if in motion. Done well, it transforms a static shot into an action scene.
9. Editing & Post-Processing
After the shoot, edit for correcting colors, exposure, eliminating distractions, horizon straightening. Not too much. Natural effects are most likely to sell. Utilize tools/software that support brushes, masking, highlight/shadow control.
Editing is when you polish your vision. Think of it like adding seasoning to food, the right amount makes it taste nice, too much ruins it. Attempt to make the car look as it does in real life, but cleaner, prettier, and brighter. Always have a first copy to reference your edits.
10. Consistency & Style
Maintain a consistent appearance if shooting several cars or for a car dealership. Same color grading, same backgrounds, same lighting. Helps in building branding and trust. Also helps in comparing condition, features throughout your inventory.
Consistency creates identity. A car seller whose photo styles are always consistent looks more professional, while hobbyists with a signature look, such as muted tones or high-contrast, build recognition. Decide early on what your “look” is going to be, then hold to it on projects.
8 Common Mistakes to Avoid While Taking Car Photos

Although these tips help you improve the image, it’s also worth knowing what not to do. These common mistakes devalue the quality of car photographs:
- Dirty car, smudges, dust in frame
- Harsh midday lighting, long shadows
- Distracting background (signs, people, wires)
- Using overly wide lenses causing distortion
- Not shooting enough angles or details
- Ignoring reflections and glare
- Poor framing (cutting parts of the car, too much empty space)
- Overediting (unnatural color, too much saturation)
Use the C-AR App to Enhance Car Photos

If you’re looking to streamline and polish your car photography after capturing good shots, tools like the C-AR App can help.
It doesn’t replace good photography fundamentals, but boosts finish and consistency. But how, you ask? Well, have a look.
- After selecting your best shots, C-AR App can automatically blur license plates, preserving privacy in listing or marketing photos.
- It provides effects such as background replacement, rim polish, reflective floor effects, and logos overlays, which can assist in making your photos look professional, showroom-quality.
- The app also includes alignment guides for framing, polish improvements on car surfaces, and style consistency across batches of images.
Frequently Asked Questions
1. What are the best phone settings for car photos?
Use highest resolution available, low ISO (100-200), reasonable shutter speed if motion is involved, shoot RAW if possible. Use HDR or exposure bracketing if needed.
2. Do I shoot interior shots any differently than exterior?
Yes. Interior shots need more light; open windows/doors, utilize interior flash or reflection; meter and adjust exposure to avoid dark shadows; focus on details like dashboard, upholstery.
3. How do I choose the best background for my vehicle model?
Match the mood: sports cars belong to cityscapes or motorways; classic/ luxury automobiles suit elegant buildings; off-road vehicles suit rugged or wooded environments. Contrasting works.
4. Is it necessary to use hi-tech gear and equipment?
Not necessarily. Great pictures can be taken with a smartphone if preparation, lighting, and composition are done well. But equipment is a plus when you require more control or very high resolution.
5. How much editing is too much?
Some minor tweaks are fine, color balance, exposure, and spot removal. But do not overdo the oversaturation, unnatural hues, and excessive HDR. The vehicle should look like real life, but with a touch of finishing.
Conclusion
It requires planning, detail, and care to master how to take good car photos effectively, from detailing to lighting and location, to using right angles and editing precisely. Each step goes into creating an average photograph into an excellent picture that communicates quality, personality, and trust.
Whether you are a collector, dealer, or just selling your car, applying these tips in combination with editing tools such as the C-AR App will help you take photos that impress, capture, and convert. Master the basics, get consistent, and spend some polish money to make your car photos pop.